FLOW
-
Create Account
-
Select Category
-
Select World
-
Enter Event Details
-
Upload Event Thumbnail Image
-
Create Profile
-
Translation of Event Content
-
Choosing Paid or Free Event
-
Scheduling an Event
-
Save Event
Create Account
To create an Event, you will need a “DOKODEMO Door” account.
Don't have an account? Please register from here.
*If you already have an account, login and proceed
Confirm your email address, enter your username, and enter password. Then click “Sign up.”
Log in and click “Set an Event” from the [camera icon] on the upper right of the screen.


Select category
Choose the category of Event you want to create.

Select World
Choose to use an existing World or create your own World.
■When creating using an existing World
*Click here▶ to see how to create an Event using an original World
Select “Use Existing World.”

Select the World you want to use for the Event.
Click the reference URL to see the actual video.

After selecting the World, click “Save & Continue.”
A confirmation message will appear asking “Do you want to quote and display World Title and Description on the Event details page?”
Select “Yes” to use, “No” to not use.
The page to enter the Event details will appear.
■When creating an original World and holding an Event
Files that can be uploaded: 360° or 180° video in file format “.mp4” and codec format “H.264”
Select “Create Original World” and click “Continue.”

Enter the file name and click “Upload Video.”
Select the video file you want to upload and click “Open.”

Check if the correct .mp4 file has been uploaded.
If correct, click “Save & Continue.”
*If you want to display explanatory captions in the World, please upload an .srt file.
Click here for how to create an .srt file
Enter Event Details
Enter the Event contents.

Enter the items noted below:
・Language used during the event
・Event title
・Event description
*”Travel spot” is added to Events in the Travel category.
Upload Event Thumbnail Image
Click “Upload from your computer.”


Click the image you want to upload and click “Open.”
When the selected image is displayed, adjust the display with “ - “ and “ + “ and click “OK.”

Photos are added. You can upload up to 3 thumbnails. Select and add images in the same way.
If you select 3 cards, it will be displayed like this.

Create Profile
Click “Edit” in “About You.”

Enter your profile details. Click “Edit” for each item to edit.

When you have finished entering the information, click “OK.”
Then upload your profile picture. Click the “+” on the person icon.

A new window will open, so select the image you want to upload, drag and drop it into the “Edit Profile Photo” frame.

The selected profile picture will be displayed.
Click “Replace Photo” if you want to change the profile picture.
*You can also edit from the the icons on the upper right of the screen icon > “My page” > “Dashboard”
Link destination: https://dokodemodoors.com/profile
.png)
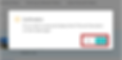
Confirm the entered contents and click “Save & Continue.”

Translation of Event Content
“Event Title” “Event Description” and “About You” are translated into English, Japanese and Chinese.
You can change each item to something different.
If you want to change the translation, click the items that you want to change for each language and make the correction.

When you click “+Add” for the category, options will be displayed. Select the category that matches the Event.
Check and click “Save”


Check and click ''Save.''
Enter an explanatory note for the category.
After setting the category, decide and set the “Minimum number of participants” and “Maximum number of participants” for the admission size.
Choosing Paid or Free Events
Events can be paid or free.
■When holding a paid event
※Click here to hold a free Event
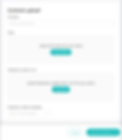
Check “Paid” and decide the amount per person for the Event.
The price after deducting the 20% usage fee will be displayed, so please confirm it.
.png)
After confirming, click “Save & Continue”
*If not already created, please create a Stripe account (an online payment service) from the icons on the upper right of the screen ⚙ (Settings) > Stripe Account > Verify Account > Follow the instructions and enter necessary information.
A Stripe account is required to withdraw your earnings.
■When holding a free event
Check “Free” and click “Save & Continue.”
The schedule settings will open.

Schedule an event
Set the date and time to hold the Event. Click “+ Add Schedule.”

Click on the date and click “Select.”

Select the start time → OK, select the end time → OK.


Click “ + “ to add the schedule.

Confirm and click “Save & Continue.”
Check the Contents and Create an Event
You can see all the contents of the created Event.
Confirm everything and click “Continue.”
.png)

“Terms of use for the Event” will be displayed.
Read and confirm the contents, and click “Save Event.”
.png)
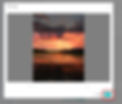
You can post a cover photo on your dashboard. Click the pencil icon to edit.
This page is open to everyone, so post an attractive cover photo to increase the number of Event participants.

After creating your Event, confirm that your Event is shown on the DOKODEMO Door Event List.
About Subtitle Files
A World can also contain explanatory captions (subtitles). There are multiple types of subtitle files, but in the World of DOKODEMO Door, files with the extension “.srt” are used.
*.srt = SubRipText
How to create a subtitle file
Subtitle files can be created with a text editor such as Notepad, without the need for special software.
1. Open a text editor.

2. Fill in the contents of the file
Enter the subtitle display time and content as follows.

1: Number
2: Write the time period to display subtitles in the order of “hours: minutes: seconds, milliseconds.”
start time + space + ”-->'' + space + end time
Enter two hyphens (-)
3: Write the subtitle content to be displayed.
4: Insert a new line.
Numbers are numbered sequentially from top to bottom.
3. Save with the extension .srt


Select “All files,” give the file an appropriate name, and enter the extension “.srt”
Select “ANSI” or “UTF-8” for the character code, and click “Save” to complete.
4. File upload
Once the subtitle file is created, upload it. Click “Upload File.”

Select the target .srt file from the pop-up window and click “Open.”

Ensure that the file name is displayed.
Select “Explanatory Caption Language.”
Click “Save & Continue.”

This completes the setting of the explanatory captions.
''Enter event details'' will open so let's continue.
How to hold an Event on the day
Steps to hold an Event
Please login to ''DOKODEMO Door'' account.
Click the card of an Event which you would like to hold from icon on the upper right of the screen > ''Dashboard.''

Scroll down the transition screen to display the Event schedule.
Check the time of the Event.


Click ''URL for Guide'' to go on to the Event space.
*Be sure to open the URL with Google Chrome

Start an Event by clicking the play button at the bottom of the space.
You can control the progress of the video by grabbing the seek bar and moving it.

How to invite friends and family to your Event
Method 1: Send the URL of the Event booking page.
Confirmed guests can participate in the Event with the participation URL attached to the Event Reservation Completion Email that arrives after making the reservation.
*If the minimum number of participants is set, reservations can only be made up to 1 hour before the Event starts
Method 2: Copy and send the ''URL for Guest.''
*Make sure to open in Google Chrome

How to edit Event
How to edit Event after creating it.
You can cancel Event schedules or add dates after creating an Event.
Click icon on upper right > click “Dashboard.“

Click “World/Event.“

Click “Event.“

Click “・・・“ > “Edit“ on the upper right part of the Event Card you want to edit.
You can cancel Event schedules or add dates from “Update schedule.“
*You cannot cancel Event schedules that are already booked.
